The Flymo 1200R: Your Solution to Effortless Lawn Care?
Humans can find joy in life’s many mundane things, but mowing the lawn isn’t one of them. It’s a task that requires you to power through and do it even if you just don’t feel like it—tech to the rescue!
Lawn care isn’t the first area that comes to mind when we think of technological breakthroughs. But autonomous lawnmowers have wholly revolutionized the once manual landscape of gardening. Unlike their human-driven counterparts, robot lawn mowers are entirely automatic and run on batteries instead of guzzling gas.
Robot mowers aren’t feasible for many due to its high price tag.
But that’s where Flymo 1200r shines — it’s an affordable, efficient, and durable alternative to all the expensive robot lawn mowers in the market today.
Flymo (Flying mower) is a subsidy of Husqvarna AB, and is renowned and revered for their innovative Hover Mower. Over the years, they have expanded their product range to include gardening tools, like GardenVac— a handy little garden gadget that is a culmination of a leaf blower and a vacuum.
Pros
- Very affordable
- Perfect for small to medium lawn
- Utilizes a mulching System that keeps the lawn healthy
- Comes with all the necessary security and safety features
- Very programmable
- Charges automatically
- Whisper-quiet operation
- Eco-friendly
Cons
- Cannot handle steep slopes
- Doesn’t have SMART features
- Cannot handle big lawns
- Doesn’t have a rain sensor
- Long installation process
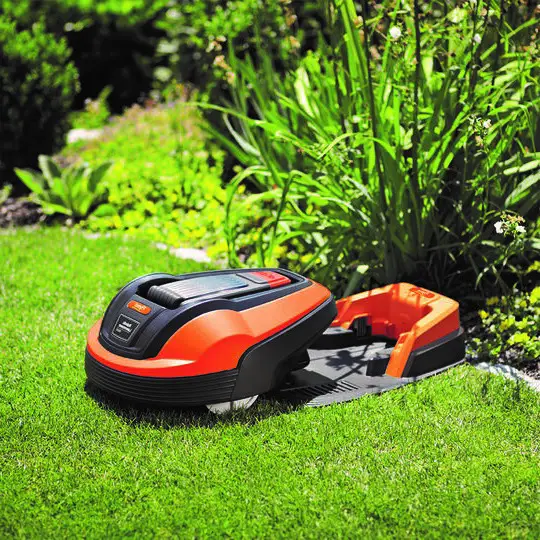
Flymo 1200R: What Is It?
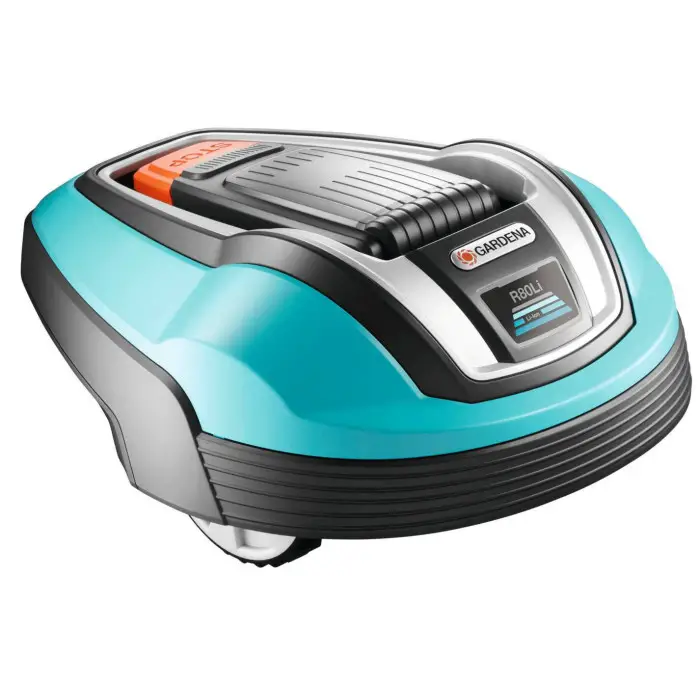
Flymo 1200R is specifically designed to handle the lawn mowing needs of small to medium-sized yards.
If you have a large yard, you should either consider getting another model or buy multiple units of Flymo.
The shape of the garden doesn’t matter. Since it mows in an irregular pattern, it will cover all areas and won’t leave any straight tracks down the freshly cut grass. The mower takes off in one direction, and when it bumps onto an obstacle, it retreats, turns, and sets off in another order.
But how does it know where to go? Boundary wires! They define the perimeter within which the mower operates.
Flymo 1200R cuts the grass tips using swing-back razor-sharp blades. The clippings are so fine that it disappears and gets absorbed into the soil to be used as a natural fertilizer. This results in fresher and healthier grass growth in the future, and you don’t have to keep buying commercial fertilizers anymore.
This mower runs on a lithium-ion 18 V/1.6 Ah battery, and when running low, it will recharge itself at the charging station and resume work when full.
It’s effortless to program the mower upon installation. You can customize the times and days using the selection panel. At the scheduled time, 1200R will start its job on its own, even during rain.

The best part, other than it’s price, is that it takes care of business efficiently and quietly. This is important if you live in a city with not much space between houses. This mower will keep your lawn trimmed without disturbing your neighbor’s restful evenings.
Key Features of the Flymo 1200R
- Covers all lawn shapes
- Easy to install
- No need to dispose of the grass clipping
- Can handle slopes up to 25% incline
- Charges automatically
- Comes with several safety features like anti-collision sensors, lift and tilt sensors, and an easy-to-access stop button
Coverage Area
This mower handles a maximum lawn size of 400 m2, making it perfect for a small-sized lawn.
Let’s be honest — if you have a small yard, it’s difficult to justify spending so much money on a fancy robotic lawnmower. That’s why the Flymo Robotic 1200r is cheap and does the job quickly.
Cutting Quality
You can customize the cutting height between 2 to 5cm, and the width is narrow at 17 cm. You can set the cutting height using the rotator knob located away from the wheels.
This robot is equipped with three fine razor blades attached to a spinning disc allowing for a smooth, flat finish. The tiny grass clippings the mower leaves behind will disappear back into the soil to produce fresh, healthy grass again. The first few times, it is recommended to start the mower on its highest height and then work your way down gradually.
Charging
This little robot mower works on an 18v Lithium-ion battery that comes with the purchase. A full charge will keep the bot running for up to 60 minutes. Your purchase also comes with a charging station. So, if it’s running low on batteries, the robot will propel itself to the charging station to recharge, which could take around 50 minutes.
Safety
Safety is a huge concern if you have children or pets or multiple items in your backyard. But don’t worry. 1200R is pre-built with plenty of safety features that will guard you, yours, and itself! It has a lift and tilt sensor that causes the blades to immediately stop working if, for example, your children get curious and lift or tilt the mower. The blades are situated way underneath the body, which means they aren’t exposed and won’t cause accidental cuts. 1200 R is also equipped with collision sensors, which means that if it were to bump into something on its way, it would stop, retreat, turn and proceed in a different direction than before. Since the mower operates pretty slowly (walking pace), it won’t incur any lasting damage even if it were to collide with something.
Security
Since we are all set on safety, let’s talk about security; after all, we don’t want anybody to steal our robot lawnmower.
This device has a PIN code and an alarm.
The preferred level of security can be adjusted through the control panel on the mower. It will ask you for a PIN code before the lawnmower starts, or if you want to customize the schedule. The alarm will go off if someone tries to pick it up from the base station, and the device will automatically lock itself and won’t activate till the PIN code is entered.
Quiet Operation
This mower operates at 58 decibels, which is the same as a quiet conversation between two people. Neither you nor your neighbors would have to wear noise-canceling headphones or earplugs even if it were to be working in the middle of the night.

Maintenance
The 1200R doesn’t require too much upkeep. The company does recommend cleaning the mower every couple of weeks. You can use a simple brush or a damp cloth to remove any grass or other debris stuck around the wheels, screws, or the cutting disc.
Debris can get stuck to the robot, especially if it operates in the rain and rolls over wet mud.
The cleaning shouldn’t take more than two minutes. The company also recommends changing the cutting blade after 4 to 7 weeks, but some people have been able to work with the same blade for three months without any significant decrease in performance.
Weather
It doesn’t have a rain sensor and will continue working in the rain. While the company does not outright say that the mower is waterproof, they do recommend bringing it inside during winter. It’s essential to keep the mower fully charged before storing it away in a dry area that is not prone to frost.
Installation
The installation process is easy but time-consuming. Expect to spend anywhere from 1 to 2 hours getting this thing up and running.
That said, you don’t have to hire a technician to set it up for you because the process is pretty simple, straightforward, and very similar to other robot lawnmowers. It also comes with an exhaustive installation guide that has all the techniques laid out neatly for you.

- Charging station
First, you need to figure out the perfect spot for your charging station. It should be located near an outlet because you will need to plug the power cable into the socket. The charging station should also have 3 m of free space in front of it. Make sure it’s a flat surface and not slopped. Also, the charging station should be on the grass and not on the pavement. The station will be secured to the ground using three long plastic screws. - Boundary wire
When you lay the boundary wire, keep in mind that you have to form a loop around the working area. You can either rest the wire on the grass or bury it. The boundary wire that comes with your purchase is 400 m long, and if you require more than this, then it’s likely that the mower isn’t suitable for your garden. If you have flower beds that you don’t want the mower to run into, place the boundary wire approximately 12 cm away from the border. You will have to run over the little patch near the flower bed with a manual mower, which shouldn’t take long. Once the boundary wire is set, your next job is to install the guidewire. - Guidewire
The guidewire starts where the boundary wire ends, and they don’t look much different. The guidewire is placed at the narrow sections of your lawn, and its purpose is to help the mower navigate to the far side of your yard to ensure that all the areas are cut uniformly. It also helps the mower locate the charging station when it’s running low on battery. - Set it up
Once the wires are installed, your robot lawn mower is ready to get started. Switch it on, and it will guide you through a few settings that allow you to set the language, country, time, date, and your PIN code. After that, put the robot on the charging station, and press start. Then it will begin its calibration process by moving from the charging station following the guidewire to the boundary wire and navigate through your lawn, mapping out the area. Once it’s finished going through the yard, you will have to trigger its return to the station. To do this, simply press the stop button and place the mower a few meters away from the guidewire, then select home on the control panel and press start. The mower will spot the guidewire and move back to the charging station. Once it docks at the base, it’s ready for use.
Final Thoughts: Is Flymo 1200R Worth it?
If you always wanted a robot lawnmower but don’t have thousands of dollars just lying around to invest in one, then Flymo 1200 R is the way to go. It’s the perfect entry-level mower for those taken by the idea of robot lawnmowers.
It doesn’t have any groundbreaking frills of AI-powered SMART mowers. Still, it efficiently performs the primary function of autonomously clips away at tall grass blades and maintains a freshly manicured lawn all year round.
If you have a large lawn, then 1200R won’t cut it — you need a robotic mower for a large lawn.
The other downside of this lawnmower is that the installation is a little time-consuming, but it is a one-time thing. Once it’s set up, it shouldn’t require any additional input from you. And, even though it’s time exhaustive, it’s very much doable on your own.
The mower does give you plenty of flexibility to decide when and how much you want to mow the lawn. You’ll likely have to cut it more frequently, at the beginning for a few weeks, and then get away with more extended periods between each session.
Be aware that it doesn’t have many fancy features found in high-end self-propelled mowers. Like, you can’t control it remotely through an app, and it doesn’t have a GPS mechanism that tells you its precise location at all times. You’ll have to get out and manually press buttons to stop it or change its settings. This might be a little frustrating for some, but it makes up for the lack of shiny features with its reliable mowing performance.
No need to sweat the small stuff, or hire someone else to sweat for you.
The Flymo 1200R adds more free hours in your day that you can spend doing things you love while watching the little robot gracefully slice away tall blades of grass.


